> For the complete documentation index, see [llms.txt](https://ladipage-vietnam.gitbook.io/v5-ladiflow/llms.txt). Markdown versions of documentation pages are available by appending `.md` to page URLs; this page is available as [Markdown](https://ladipage-vietnam.gitbook.io/v5-ladiflow/tich-hop/huong-dan-tich-hop/tich-hop-bitrix24.md).
# Tích hợp Bitrix24
### Thêm tích hợp Bitrix24
1. Tìm và chọn ứng dụng **Bitrix24**.
2. Chọn **Thêm liên kết**.
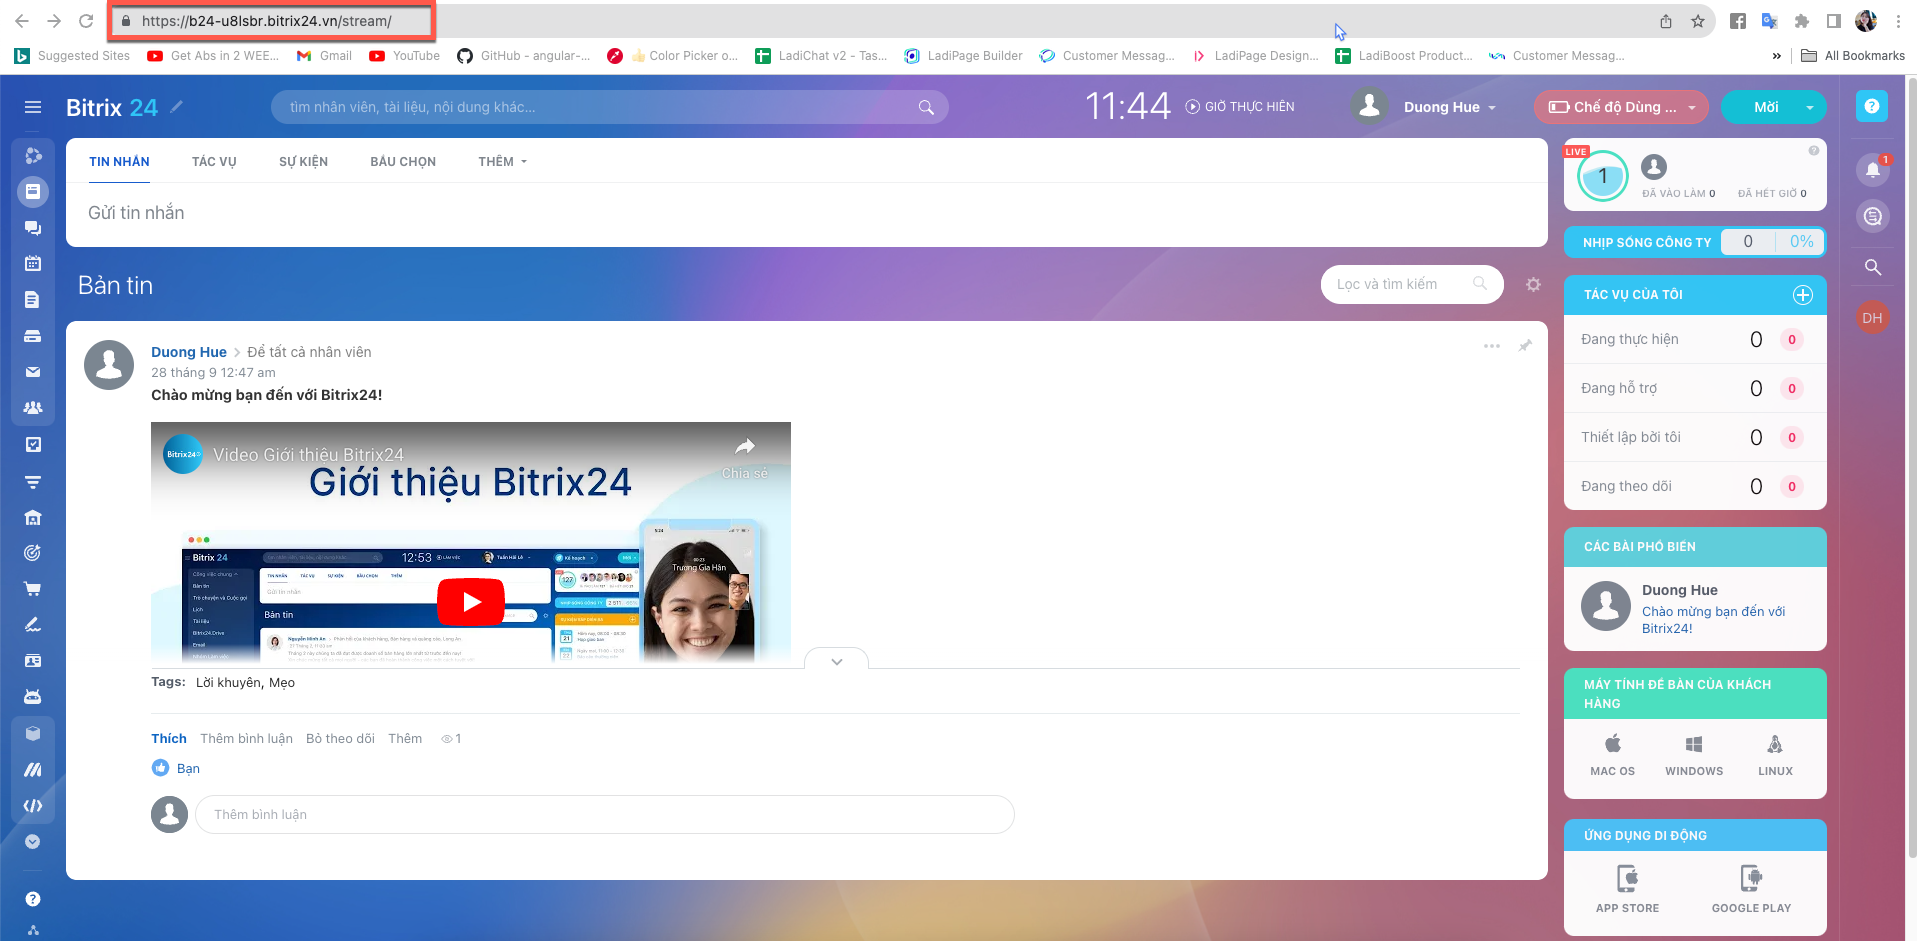
3. Điền đường dẫn tới Bitrix của bạn vào API URL.
### Thêm ứng dụng trên Bitrix24
1. Mở 1 cửa sổ trình duyệt mới, **truy cập Bitrix24 và đăng nhập với tài khoản của bạn.**
2. **Tạo 1 ứng dụng cục bộ .**
* Chọn **Ứng dụng**, sau đó chọn **Tài nguyên cho nhà phát triển.**
* Chọn **Khác**
* Chọn **Ứng dụng cục bộ**
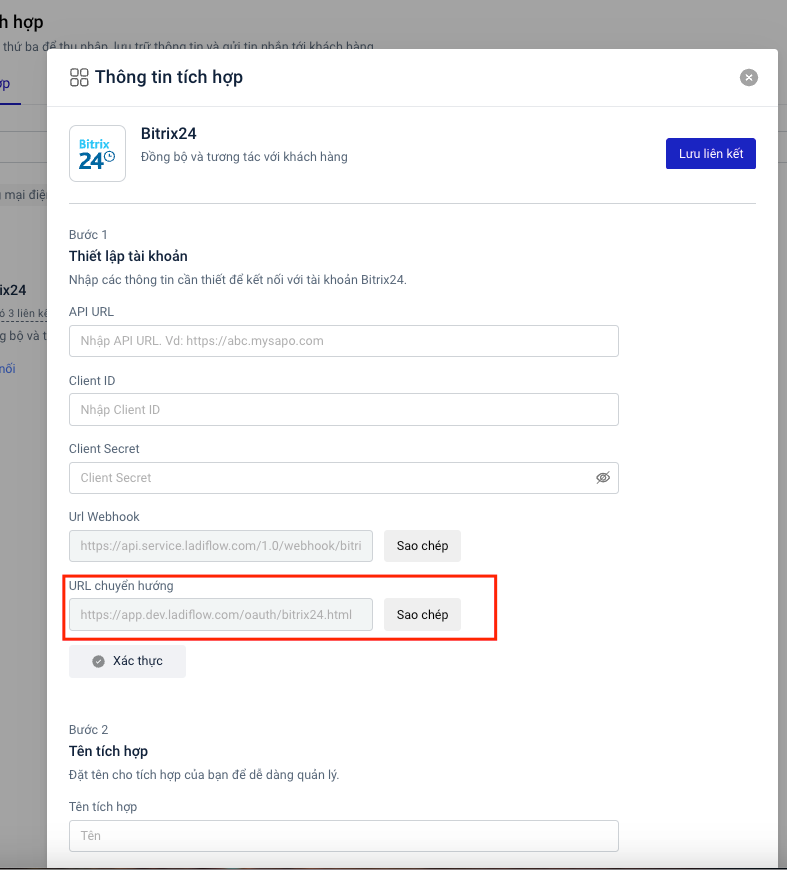
* Điền các thông tin để tạo. Trong đó **Đường dẫn xử lý và đường dẫn cài đặt ban đầu** bạn điền đường dẫn **URL chuyển hướng trên Automation.**
* Thông tin các quyền:CRM, người dùng (tối thiểu), người dùng (cơ bản).
* Chọn **Lưu**.
3. **Tạo tương tự 1 ứng dụng Webhook ra ngoài.**
* **Cài Đặt**, chọn T**ài nguyên cho nhà phát triển**, sau đó chọn **Khác**. Chọn **Webhook ra ngoài.**
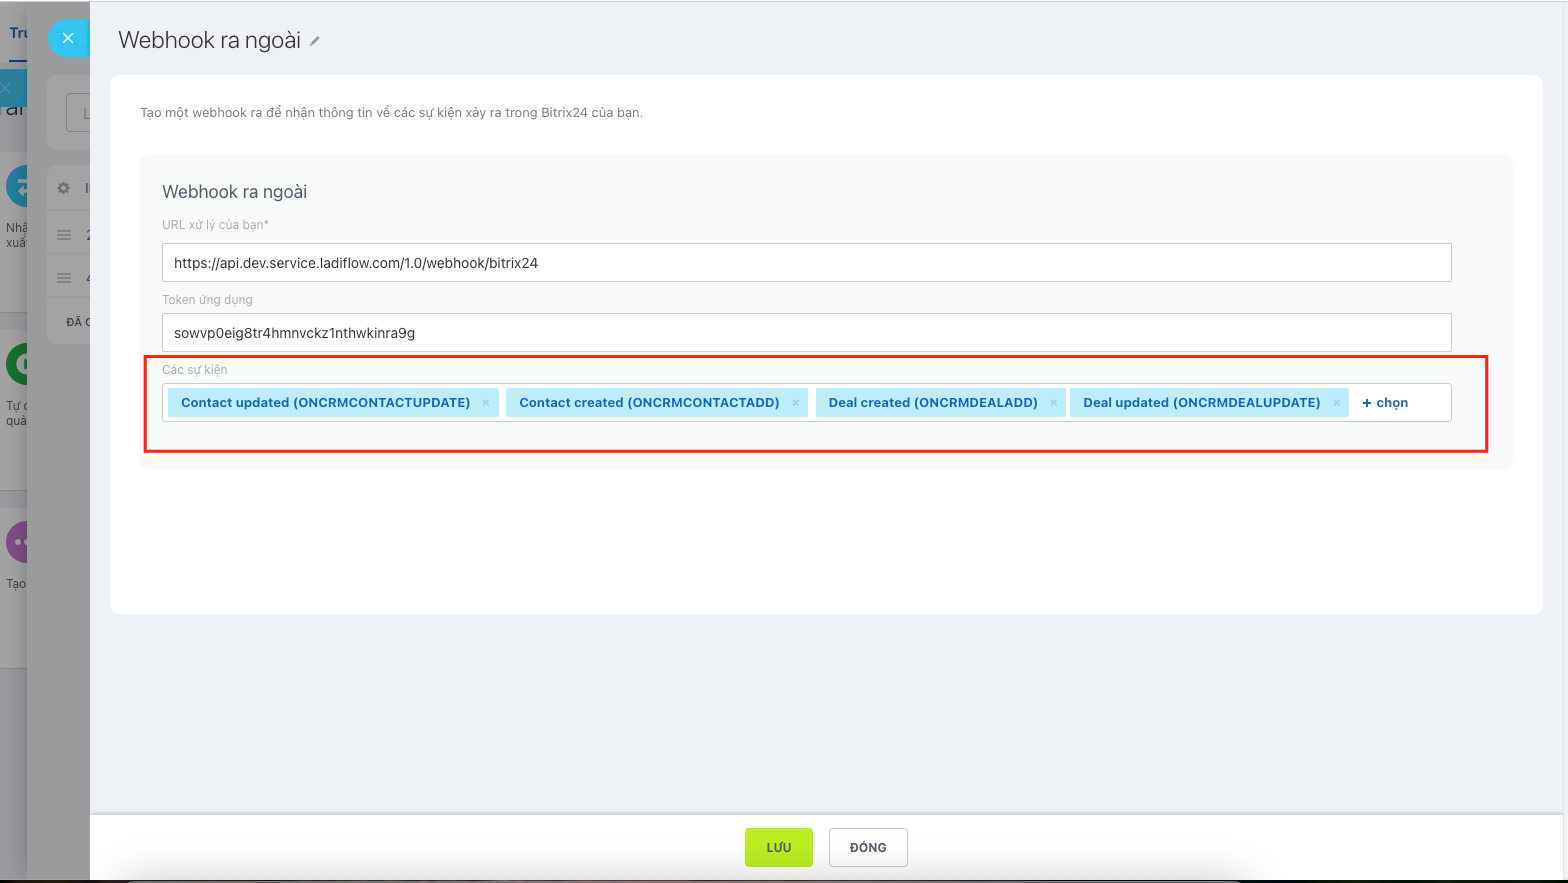
* Điền thông tin vào form sau đó chọn **Lưu.**
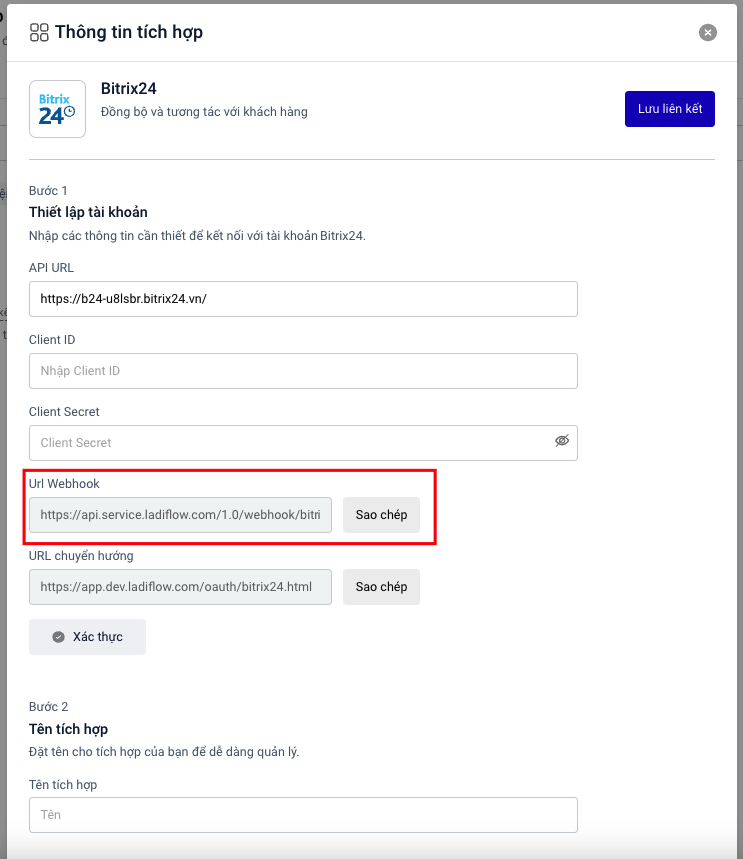
* **URL xử lý** **của bạn**: dán **Url webhook từ form Automation**
* Chọn các sự kiện: Contact updated, contact created, deal created, deal updated
### Nhập các thông tin vào form thêm mới liên kết trên **Automation** với dữ liệu bạn vừa tạo
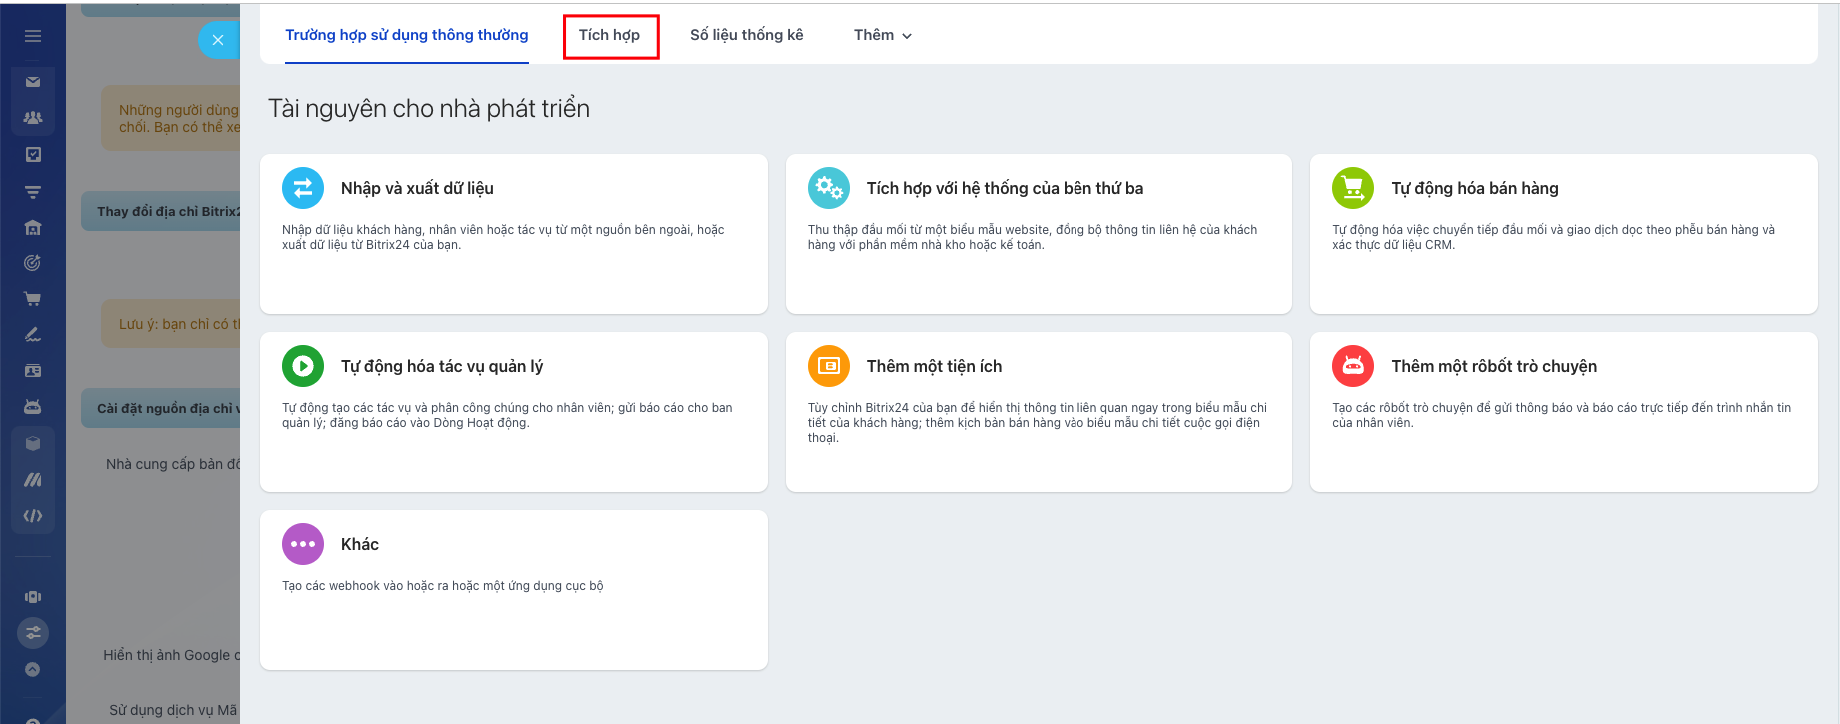
1. Trên Bitrix24 đóng tab Khác, **chọn Tích hợp.**
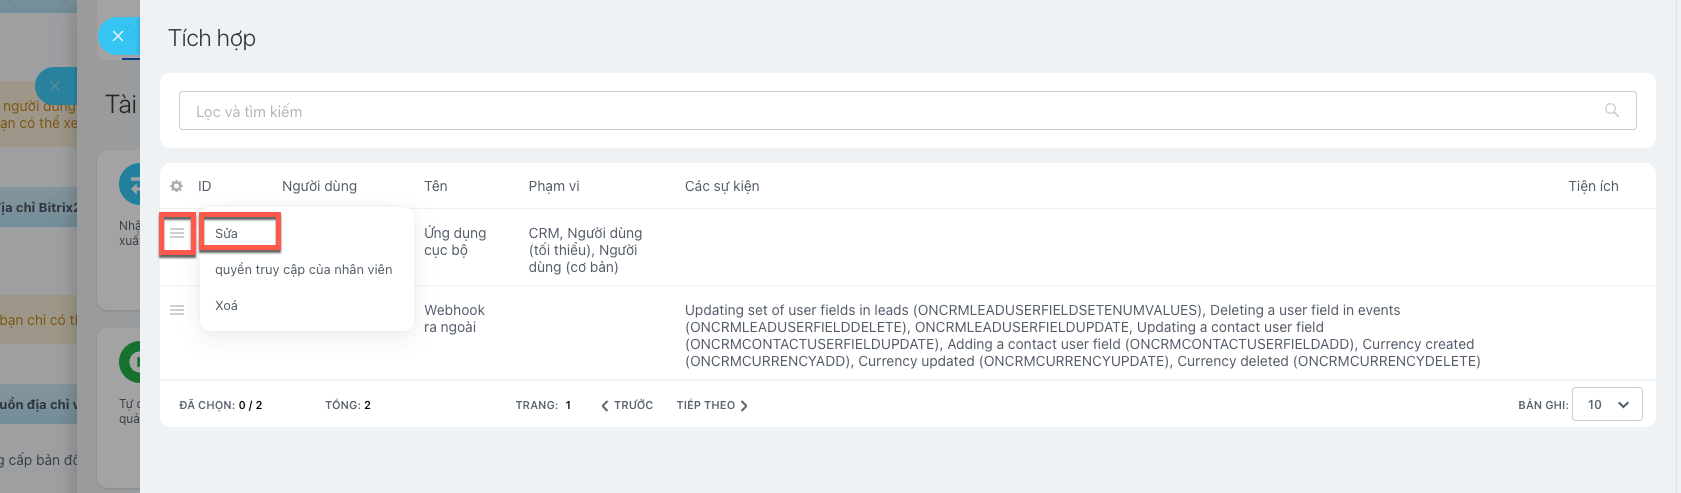
Chọn **ứng dụng cục bộ bạn vừa tạo**, chọn **Sửa**.
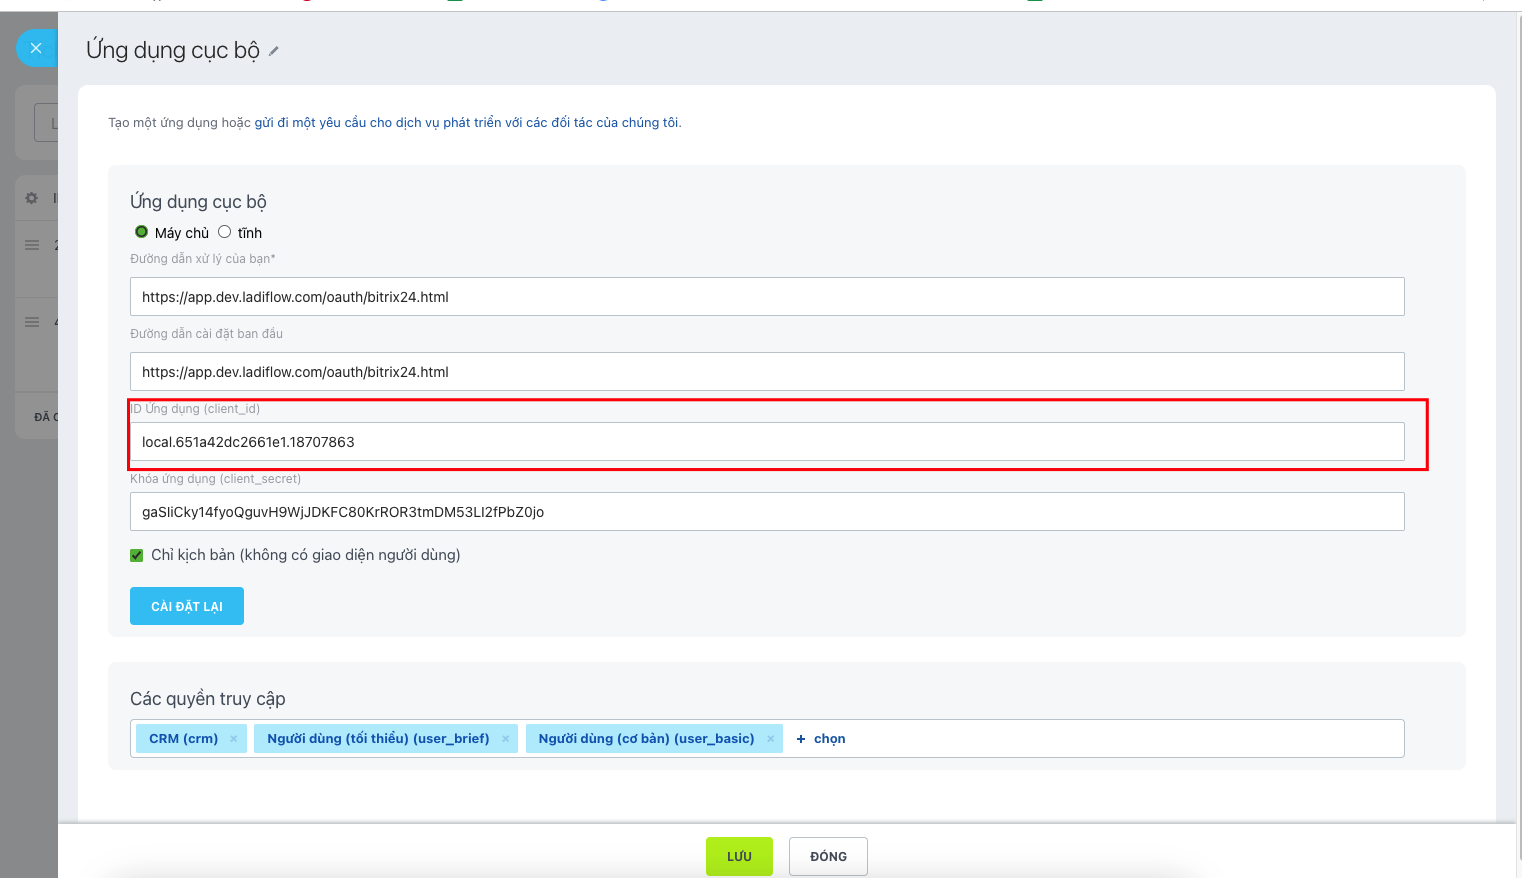
2. **Copy client\_id paste vào Client ID trên form thêm liên kết Automation.**
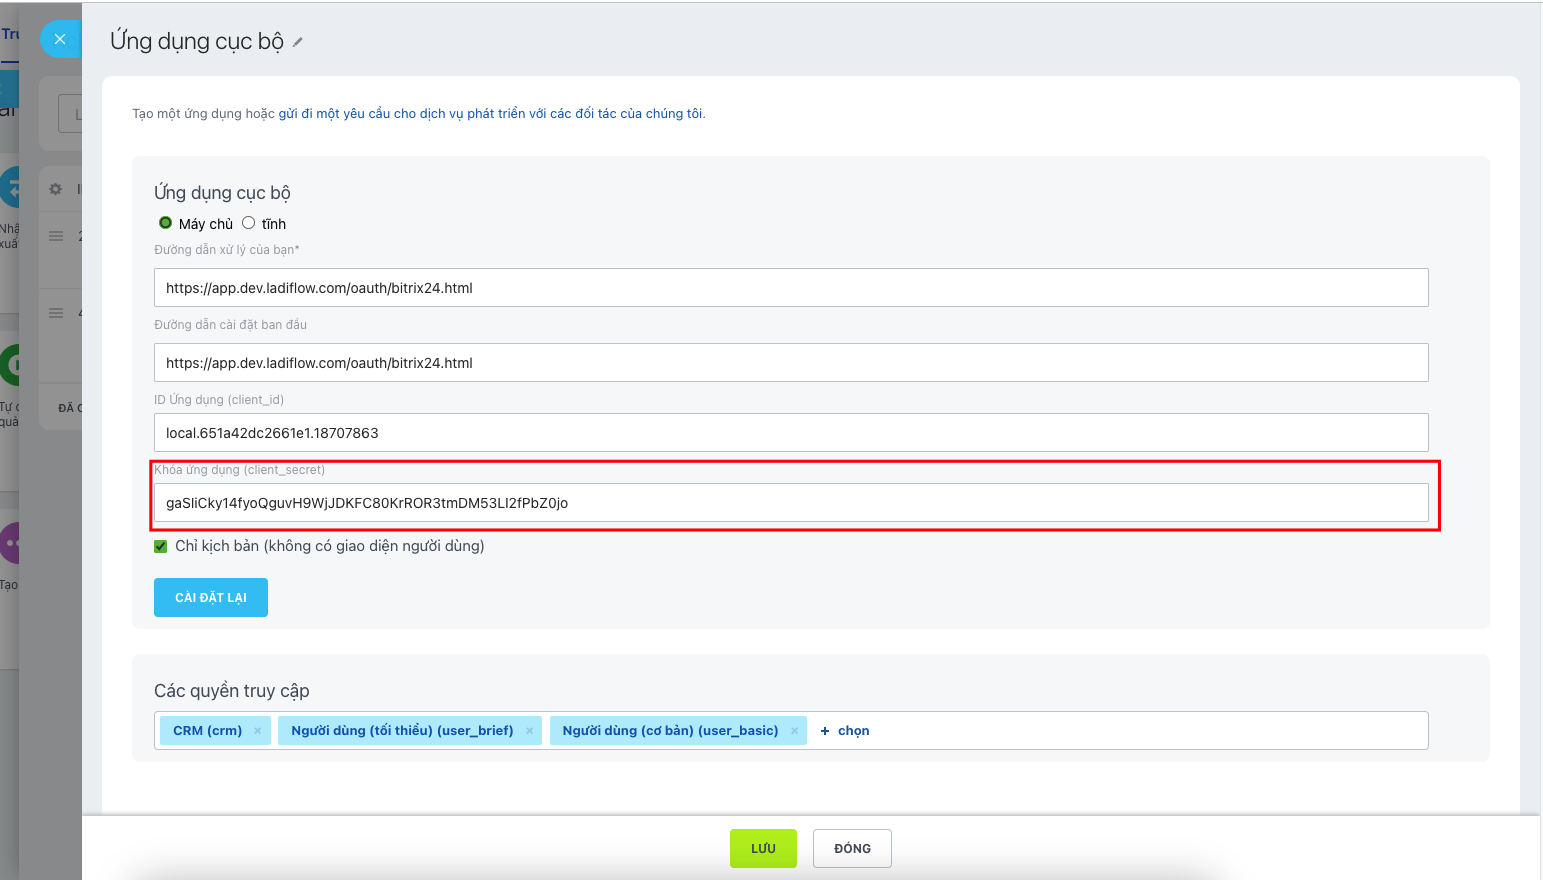
3. **Copy Khóa ứng dụng (client\_secret)** paste vào **Client Secret trên form thêm liên kết Automation.**
4. **Chọn Xác thực**, **điền Tên liên kết** và **chọn Lưu liên kết.**
{% hint style="info" %}
**Hiện tại hệ thống không giới hạn số tích hợp Bitrix24.**
{% endhint %}